Running SpinKube on Rancher Desktop: An Update.
 Tim McCallum
SpinKube
Rancher
Suse
Containers
In line with Rancher’s announcement of SpinKube support in March, we published an article that showed how easy it was to install Rancher Desktop, add SpinKube, and then build a simple JavaScript app for deployment inside a Rancher Desktop cluster. If you followed along with that blog post, you may have thought, “Well, that couldn’t have been any easier”. It turns out that with Rancher Desktop version 1.14.0, things have become even easier again! Let’s dive in to learn more.
Download Rancher Desktop
First, navigate to the Rancher Desktop releases page and select the appropriate installer for your operating system. The latest version at the time of writing is 1.14.2, which we will use today.
Install Rancher Desktop
Then, run the downloaded installer and follow the on-screen instructions to complete the installation.
Configure Rancher Desktop
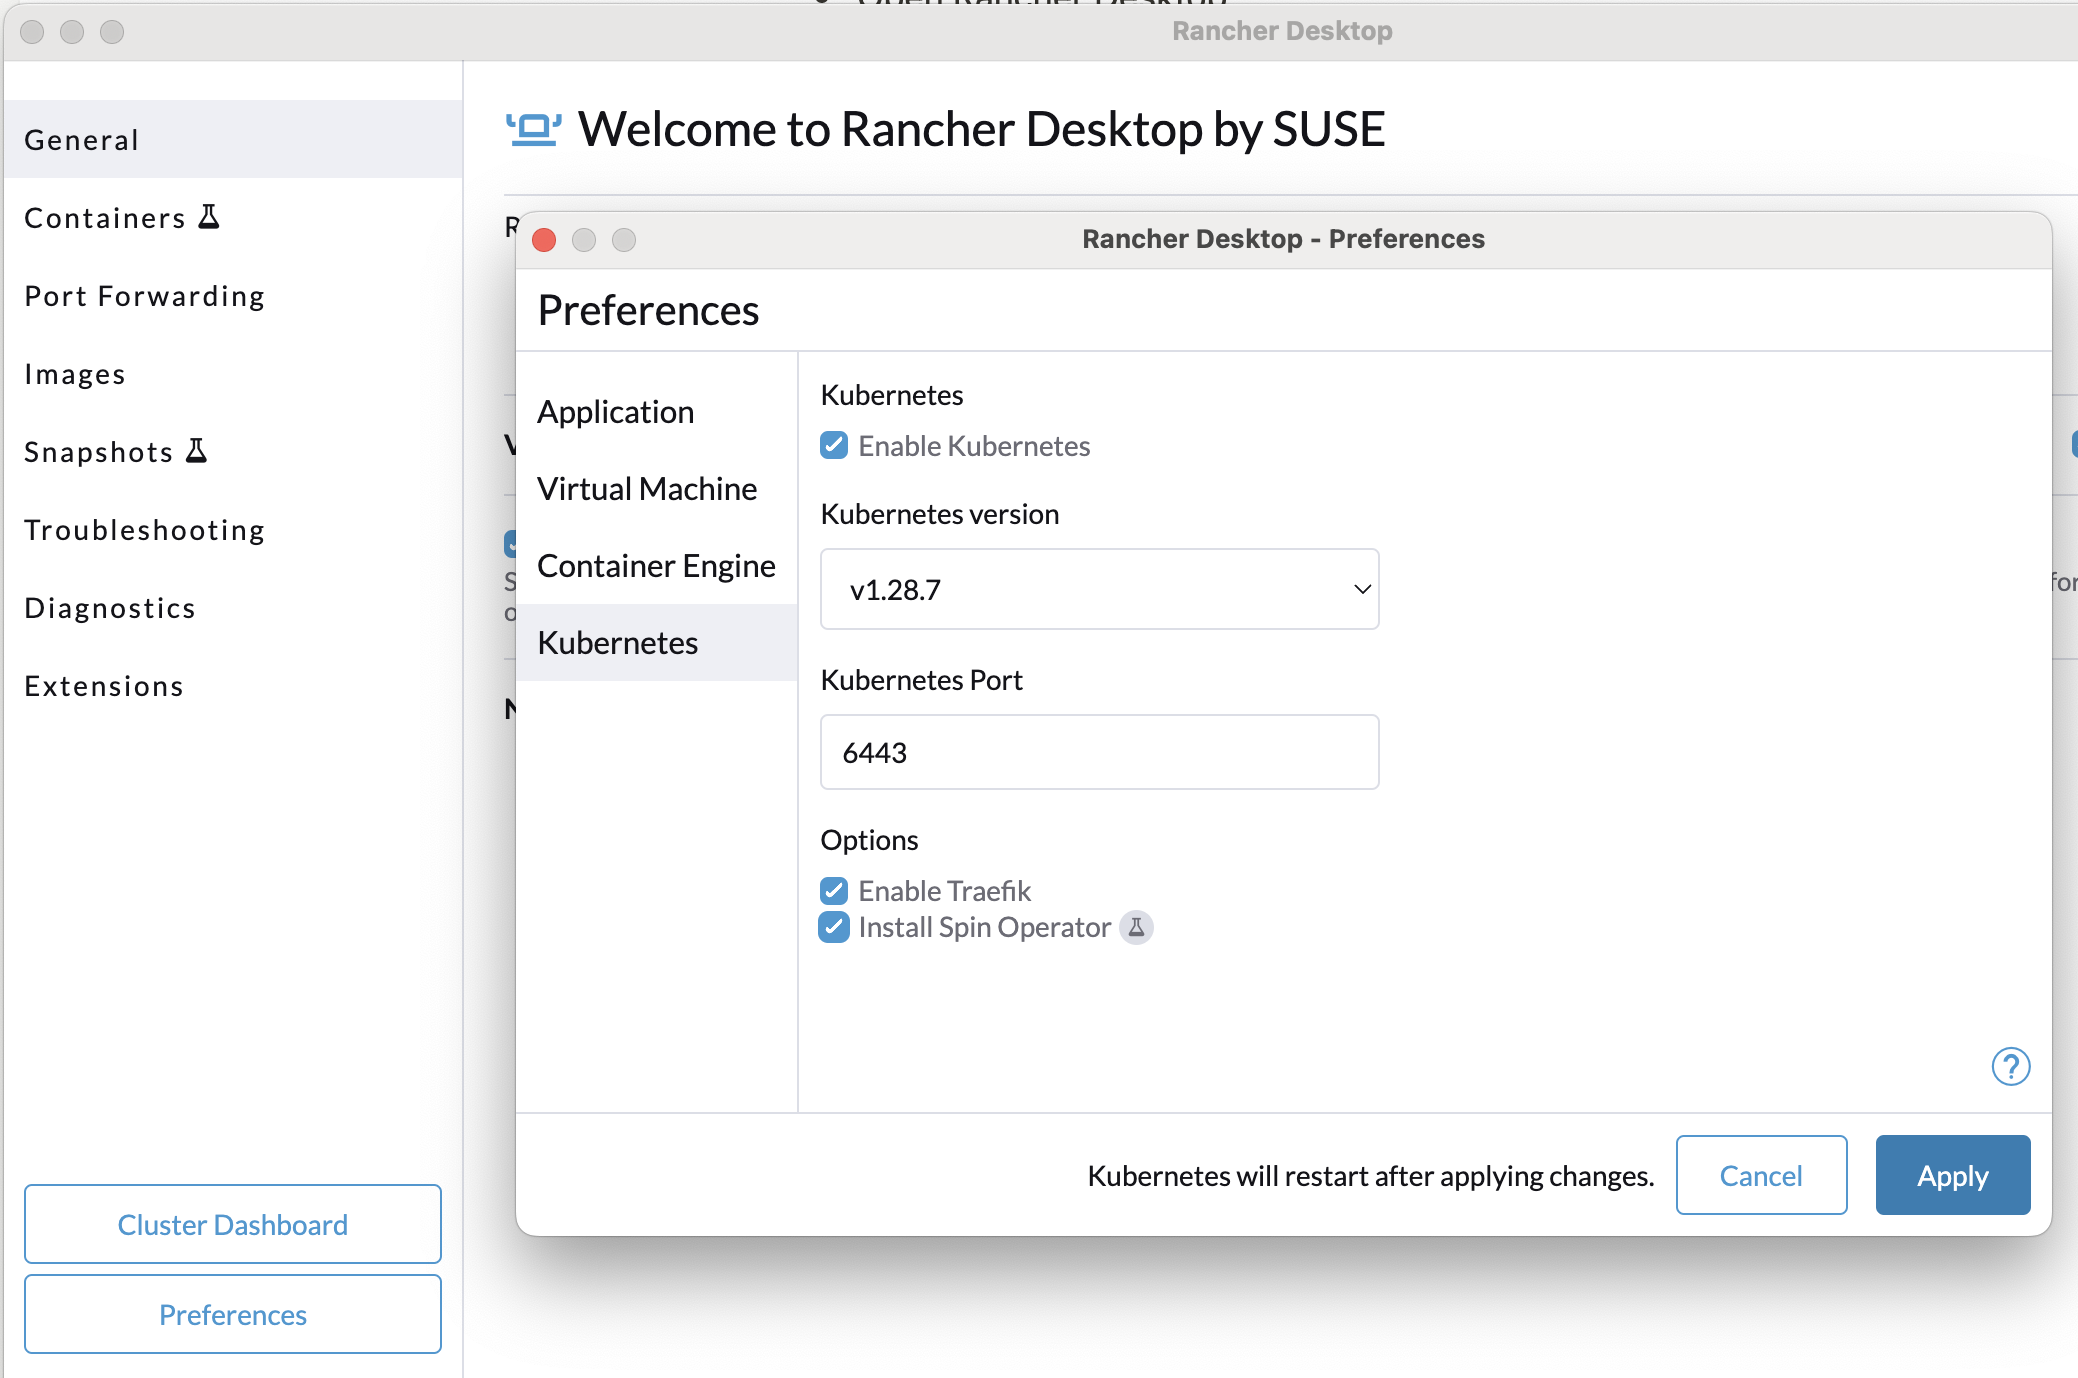
Once installed, we open Rancher Desktop, and navigate to the Preferences -> Kubernetes menu. Then, ensure that the Enable Kubernetes is selected and that the Enable Traefik and Install Spin Operator Options are also checked. Then Apply changes:
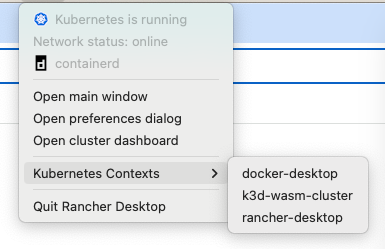
We need to make sure that the rancher-desktop option is selected in the Kubernetes Contexts configuration in the toolbar:
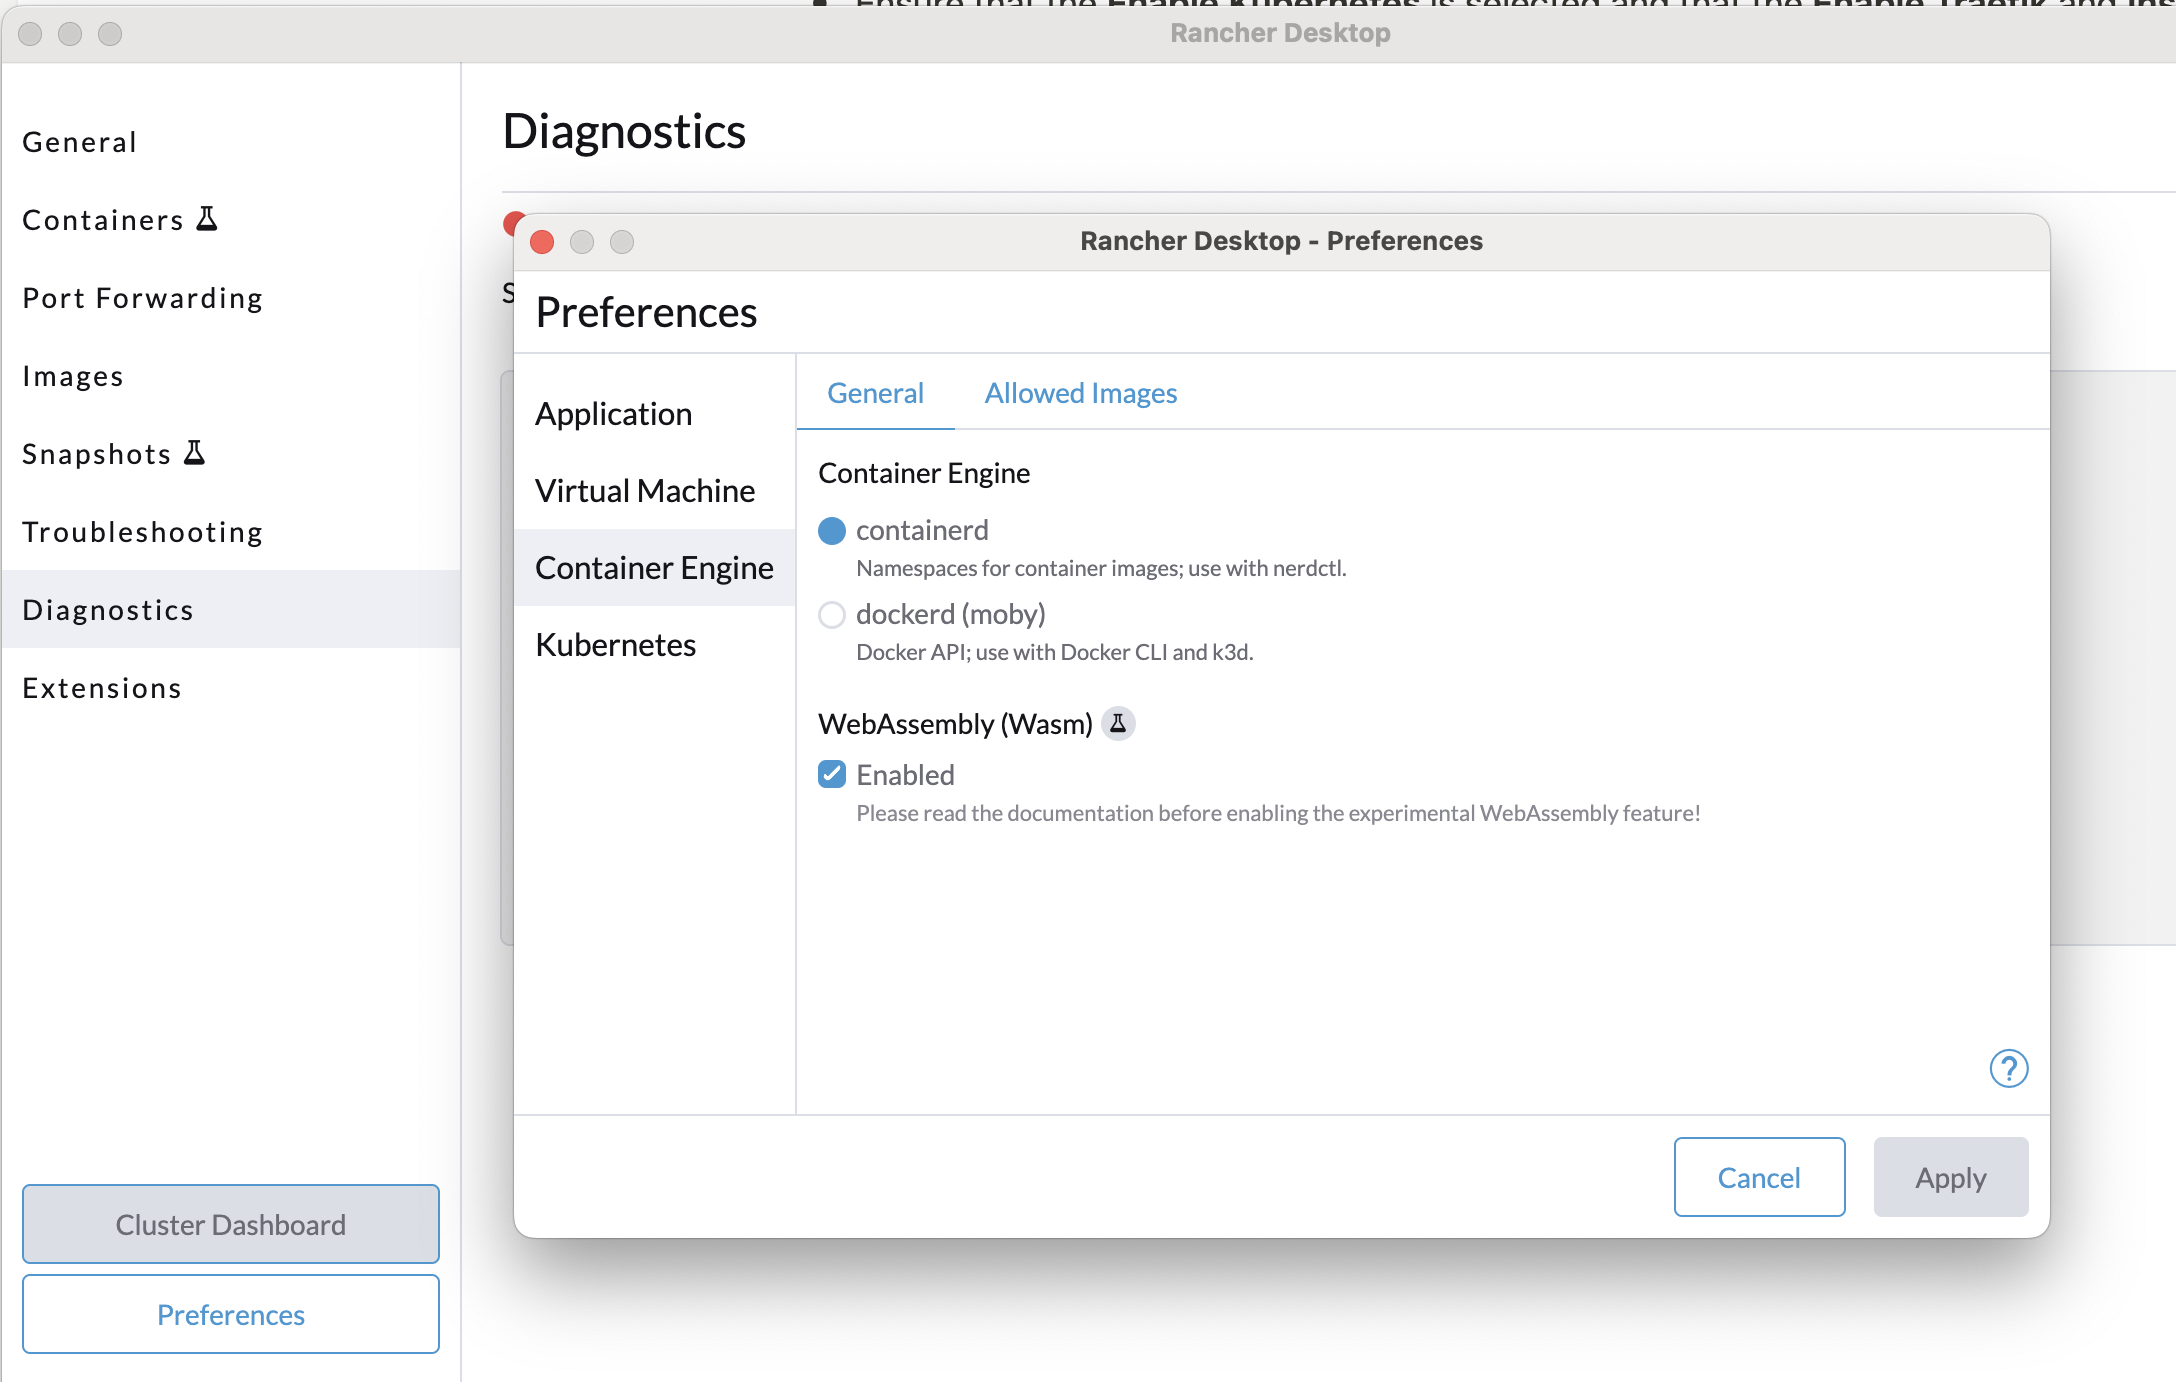
Next, we make sure that the Enable Wasm option is checked in the Preferences → Container Engine section. And again, apply changes before proceeding:
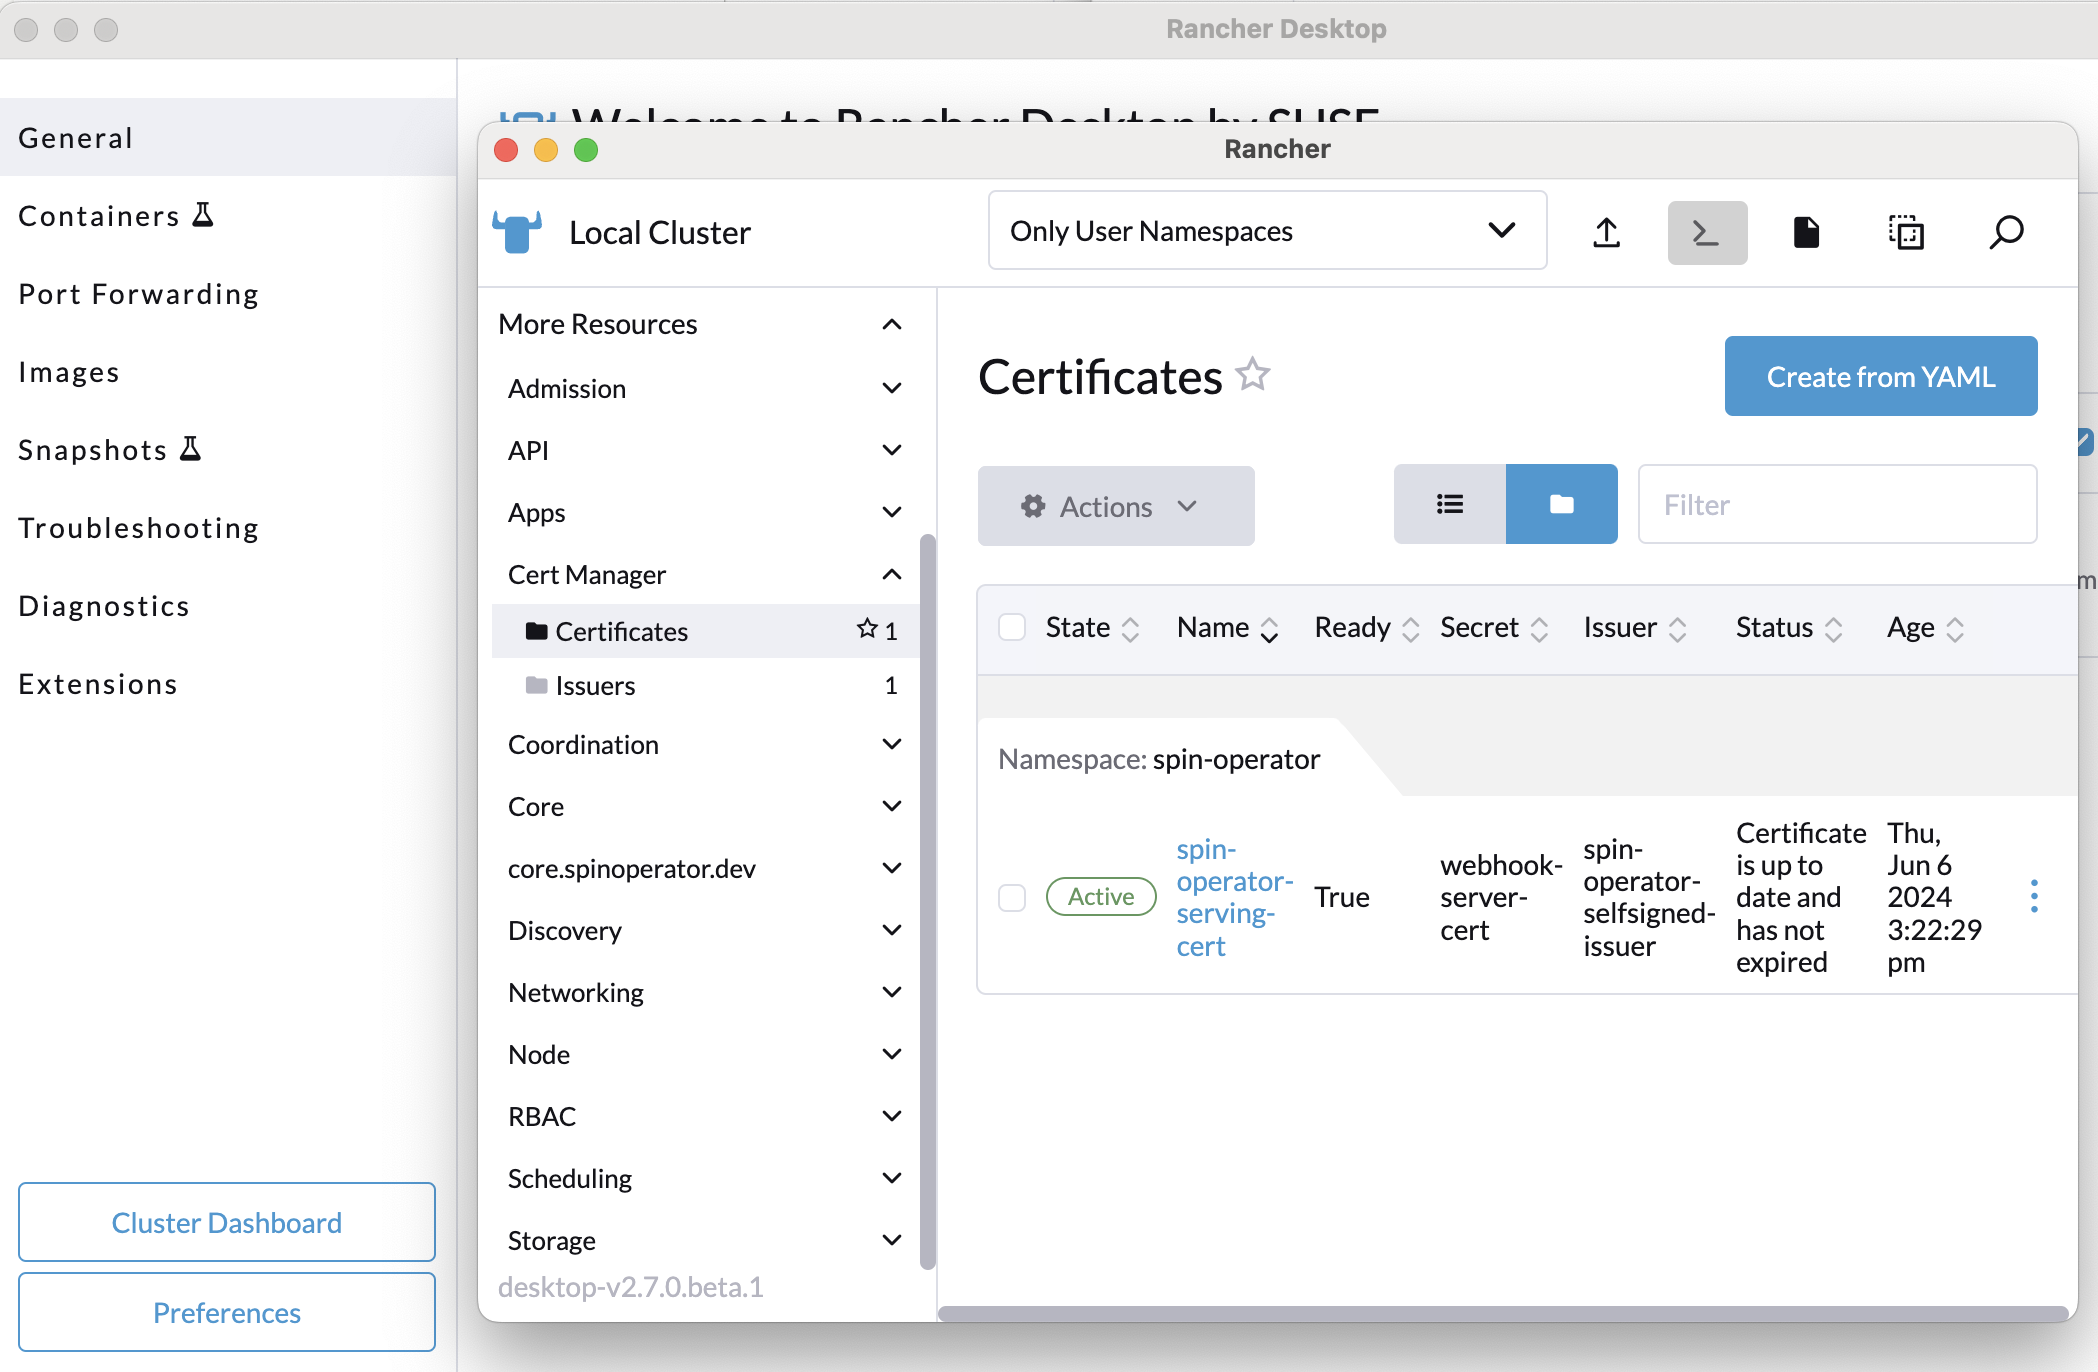
Once these changes have been applied, we can go to the Cluster Dashboard → More Resources → Cert Manager section and click on Certificates. Here, we will see the spin-operator-serving-cert is ready:
Creating a Spin Application
If you haven’t already done so, please go ahead and install the latest version of Spin.
If you already have Spin installed, check what version you are on and upgrade if required.
To create a new Spin app, we run the following commands:
$ spin new -t http-js hello-rancher-desktop --accept-defaults
$ cd hello-rancher-desktop
We can now build and push this app to a registry:
$ npm install
$ spin build
$ spin registry push ttl.sh/hello-rancher-desktop:0.1.0
Replace ttl.sh/hello-rancher-desktop:0.1.0 with your registry URL and tag.
We now prepare the necessary Kubernetes deployment configurations:
$ spin kube scaffold --from ttl.sh/hello-rancher-desktop:0.1.0
Deploying the app into the Kubernetes cluster (managed by Rancher Desktop) is done with the following command:
$ spin kube deploy --from ttl.sh/hello-rancher-desktop:0.1.0
We can see our hello-rancher-desktop service running when we get the list of the services running in the default namespace:
$ kubectl get svc --namespace default
NAME                    TYPE        CLUSTER-IP    PORT(S)
hello-rancher-desktop   ClusterIP   10.43.3.157   80/TCP
Using that service name, we can now use port forwarding to access the app from our host machine:
$ kubectl port-forward svc/hello-rancher-desktop 8083:80
To test locally, we can make the following request:
$ curl -i localhost:8083
And, we get the correct Hello from JS-SDK result.
If you would like to chat with other users and learn more about SpinKube you can visit the #spinkube channel in the Cloud Native Computing Foundation’s Slack, read the official SpinKube documentation and follow SpinKube on X.